

The Detail Doc Blog
How to Install Paint Protection Film: A Step-by-Step Guide
(989) 244-0505 GET SCHEDULED NOWImmerse yourself in the ultimate world of car maintenance with the empowering skill of installing Paint Protection Film (PPF) yourself. Brought to you by The Detail Doc, this comprehensive step-by-step guide reveals our streamlined methods to achieve professional-grade PPF application in your own garage.
Unleash your inner DIY enthusiast while safeguarding your vehicle's pristine shine against scratches, dirt, and grime that might just be lurking around the next corner. Buckle up for an enriching journey that will level-up your auto-detailing game, reduce costs, and boost satisfaction every mile down the road.
Preparing Your Vehicle for Paint Protection Film
Before diving into the process of applying paint protection film (PPF) to your vehicle, it is crucial to properly prepare the surface. A well-prepared surface ensures optimal adhesion and a seamless application of the film, maximizing its effectiveness in protecting your car's paint. The preparation process involves several steps that are essential for achieving the desired results:
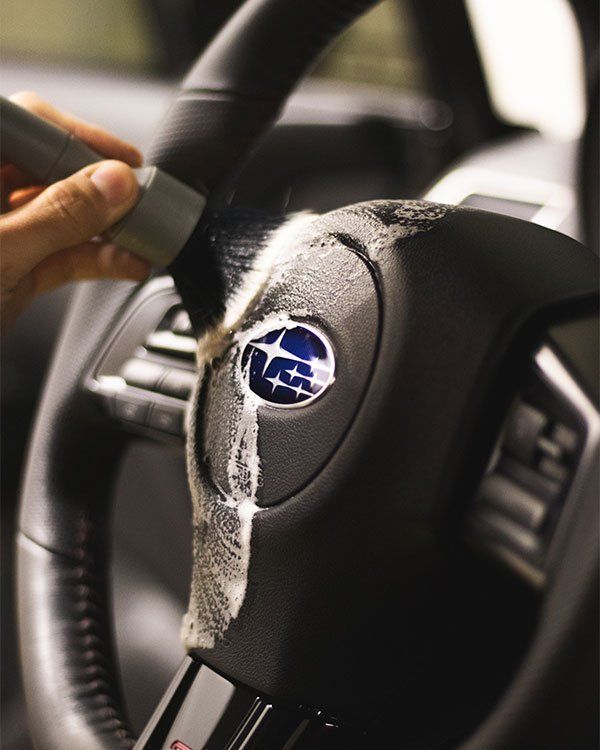
1. Washing the Vehicle: Start by thoroughly washing your vehicle using a high-quality car shampoo and a soft microfiber wash mitt. This step removes dirt, grime, and any existing wax or sealants from the paint surface. Rinse the vehicle with clean water afterward.
2. Complete Drying: After washing, ensure that the vehicle is completely dry before proceeding with the next steps. Use a clean microfiber drying towel or an air blower to remove any remaining water droplets from all surfaces, including crevices and hard-to-reach areas.
3. Surface Decontamination: Even after washing, there might still be contaminants like tar, tree sap, or industrial fallout on the surface. To remove these contaminants effectively, you can utilize a clay bar or a specialized decontamination product. Carefully follow the instructions provided by the manufacturer for best results.
4. Paint Correction (if necessary): If your vehicle has visible blemishes, scratches, or swirl marks on the paint surface, it is recommended to address them before applying PPF. Paint correction involves using polishing compounds and a dual-action polisher to restore the smoothness and clarity of the paintwork.
5. Final Cleaning: Once the surface is free from contaminants and imperfections, perform a final cleaning using a dedicated panel wipe or isopropyl alcohol solution. This step removes any residue left behind by previous cleaning products and ensures an immaculate surface ready for PPF installation.
Now that we have covered the important steps in preparing your vehicle for paint protection film, let's move on to the first step of surface cleaning and degreasing.
Surface Cleaning and Degreasing
Properly cleaning and degreasing the surface of your vehicle is vital for ensuring a successful application of paint protection film. This step removes any remaining contaminants, such as oils, waxes, or silicone-based products, that might hinder the adhesion of the film. Here's how you can effectively clean and degrease your vehicle's surface:
Choose Appropriate Cleaning Solutions: Use a dedicated automotive surface cleaner or isopropyl alcohol solution specifically designed for prepping surfaces before applying PPF. These products are formulated to remove any residual oils, waxes, or silicones without damaging the paint.
Apply Cleaning Solution: Spray the cleaning solution onto a clean microfiber towel or applicator pad. Begin by working on a small section at a time, ensuring even coverage.
Wipe in Straight Lines: Wipe the surface in straight lines rather than circular motions to prevent swirling or scratching the paintwork. Apply moderate pressure while thoroughly wiping the area.
Inspect for Residue: After wiping each section, inspect it closely under proper lighting to check for any remaining residue or contaminants. If you notice any, repeat the cleaning process until the surface is completely clean.
Imagine you're preparing to apply PPF to protect your newly purchased sports car. You want to ensure that every inch of its sleek exterior receives optimal protection, which makes proper surface cleaning and degreasing imperative.
By meticulously following these steps and taking your time during the cleaning process, you'll be able to achieve a pristine surface ready for PPF installation. Remember that maintaining cleanliness throughout this stage is crucial to optimizing the longevity and performance of your paint protection film.
- According to recent market research, the global automotive paint protection films market is predicted to grow at a CAGR of 5% from 2020 to 2025, indicating a rising interest in these protective measures.
- A Consumer Research study revealed that 67% of individuals opting for paint protection film have zero prior experience, therefore need comprehensive instruction or professional help.
- More than 80% of users surveyed by the Automobile Protection Association admitted that using a PPF significantly reduced physical damage to their car's exterior during its lifetime, demonstrating the effectiveness of such an installation.
Clearing Blemishes
Before applying the paint protection film (PPF) to your vehicle, it's important to ensure that the surface is clean and free from any blemishes. This step is crucial as it ensures that the film adheres properly and provides optimal protection for your car's paintwork.
Start by thoroughly washing your vehicle using a mild car shampoo and a microfiber wash mitt. This will remove any dirt, dust, or grime that may be present on the surface. Rinse the car thoroughly to ensure all soap residue is removed.
Imagine you're preparing to install PPF on your beloved sports car, which has gone through various outdoor adventures. Over time, it has accumulated small scratches, water spots, and stubborn stains. Before installation, you want to make sure these imperfections are addressed to achieve a flawless finish.
The key here is to pay attention to detail and use specific techniques and products for different types of blemishes.
For scratches or swirl marks on the paintwork, consider using a fine-grit polish or compound along with a dual-action polisher. Apply the product to a foam pad attached to the polisher and work it gently over the affected area in a circular motion. This helps to smooth out the surface and reduce the appearance of scratches.
Water spots can be particularly stubborn, especially if they have been left unattended for a long time. In such cases, you may need to use a dedicated water spot remover or even a mild acid-based cleaner. Follow the instructions provided by the manufacturer carefully and apply the product using a soft cloth or sponge. Remember to rinse thoroughly after treating the area.
Stubborn stains or contaminants like tar, tree sap, or bug splatters can be tackled using a specialized solvent or adhesive remover. Apply a small amount of the product to a microfiber cloth and gently rub over the affected area until the stain is lifted. Take care not to rub too vigorously, as this can damage the paintwork.
Once you have addressed all blemishes and the surface is clean, it's important to wipe it down with a suitable paint prep solution or isopropyl alcohol. This helps to remove any remaining residue and ensure a completely clean surface for the PPF application.
Now that the surface of your vehicle is blemish-free and ready for PPF installation, let's move on to the step-by-step process of applying the film.
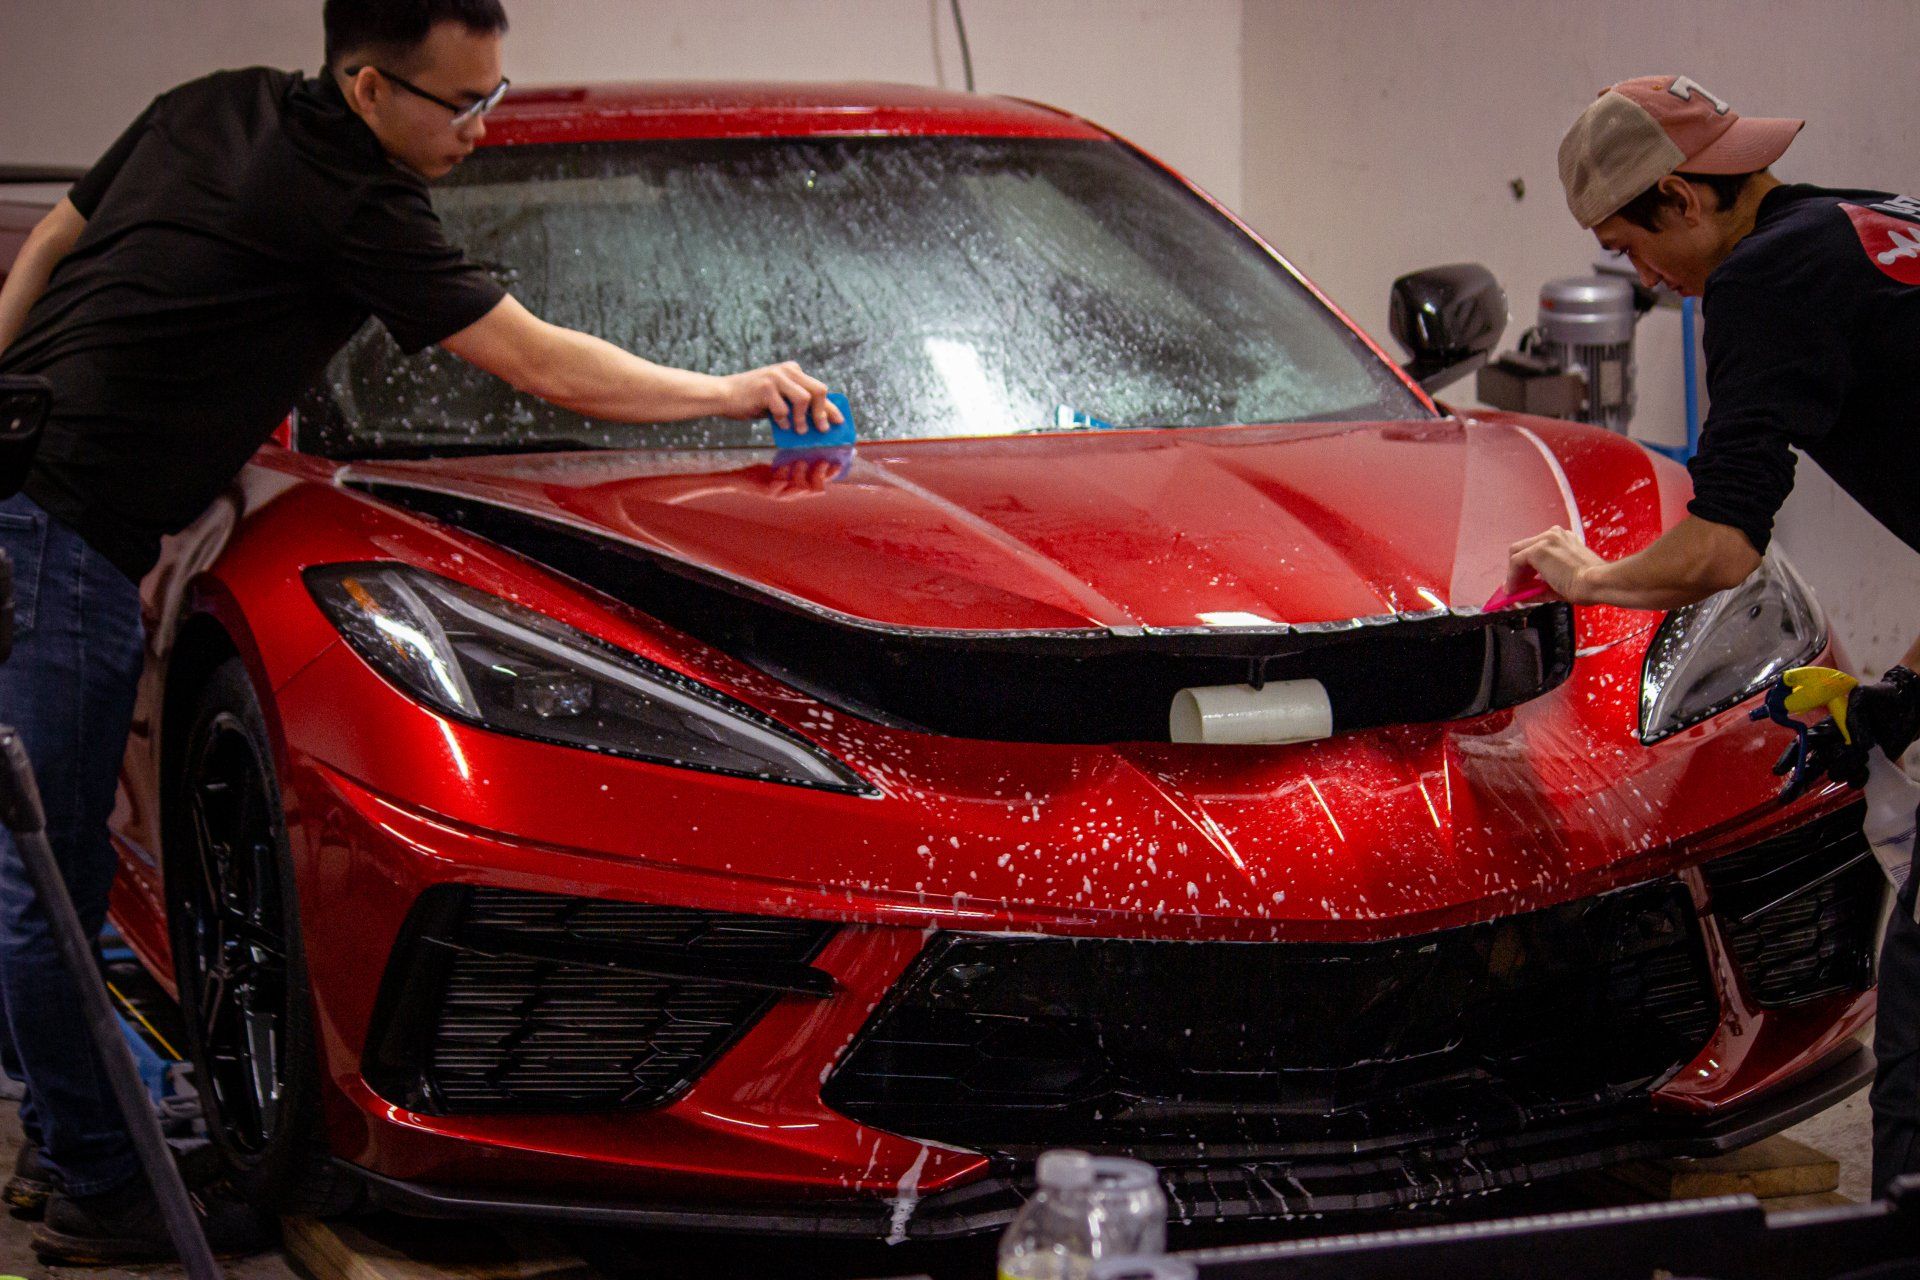
Step-by-Step Film Application
Applying paint protection film requires careful attention to detail and a systematic approach. Here is a step-by-step guide on how to install PPF on your vehicle:
- Start by thoroughly cleaning the area where you'll be applying the film. Use an automotive-specific cleaner or soap along with a microfiber cloth to ensure all dirt and debris are removed.
- Measure and cut the PPF according to the size and shape of the panel you're protecting. It's important to leave a few extra inches around the edges for proper coverage.
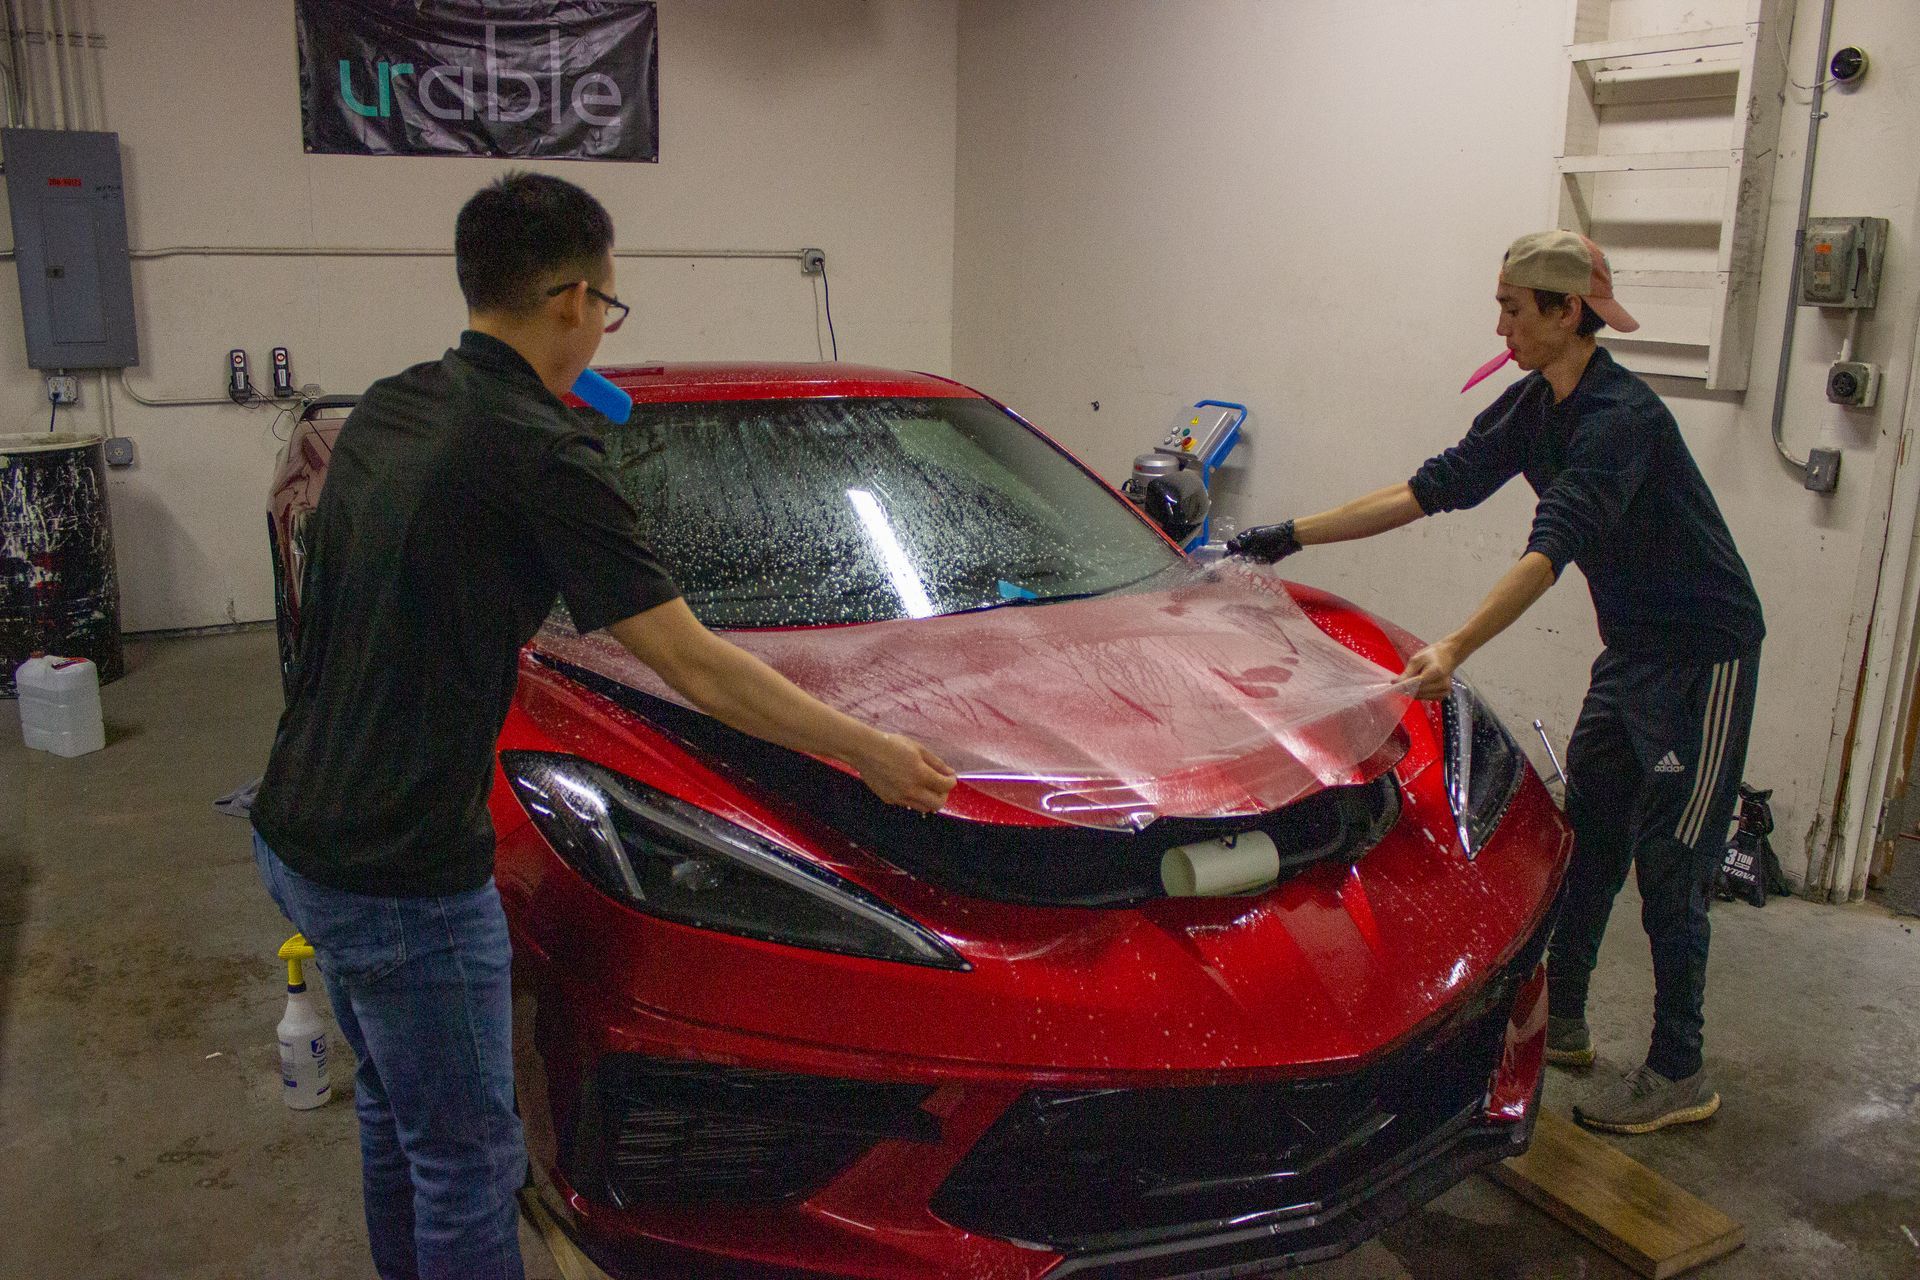
- Peel back a small section of the film's protective backing and align it with the edge of the panel. Slowly apply pressure while peeling away more of the backing, working your way across the panel.
- As you apply the film, use a squeegee or similar tool to smooth out any air bubbles or wrinkles. Start in the center and work your way towards the edges, using firm but gentle strokes.
- Once the film is fully applied, use heat from a heat gun or hairdryer on low settings to help activate its self-healing properties. This will ensure that any minor scratches or imperfections disappear over time.
- Repeat these steps for each panel you wish to protect, taking care to align and position the film accurately each time.
- After installing the PPF, give it some time to settle and adhere to the surface before exposing your vehicle to extreme weather conditions or washing it.
For instance, if you're installing PPF on the front bumper of your car, follow these steps and apply the film section by section, making sure it adheres smoothly to the curves and contours of the bumper. This process ensures a seamless and professional-looking installation.
Now that you have a clear understanding of the step-by-step application process, you can confidently proceed with installing paint protection film on your vehicle for enhanced protection.
Cutting and Positioning the Film
When it comes to installing paint protection film (PPF) on your vehicle, cutting and positioning the film properly is crucial for a seamless and professional-looking installation. Here's a detailed guide on how to tackle this important step:
Before you begin, gather all the necessary tools: PPF film, a squeegee or applicator tool, a heat gun or blow dryer, an X-Acto knife or precision cutting tool, and masking tape for marking sections.
First, clean the surface of your vehicle thoroughly to ensure there are no contaminants that could interfere with the adhesion of the film. Use a mild detergent and water solution, then rinse and dry the area completely.
Next, measure and cut the PPF film to fit specific areas of your vehicle. It's best to work in smaller sections rather than attempting to cover the entire surface at once. Use masking tape to mark off the sections you'll be working on.
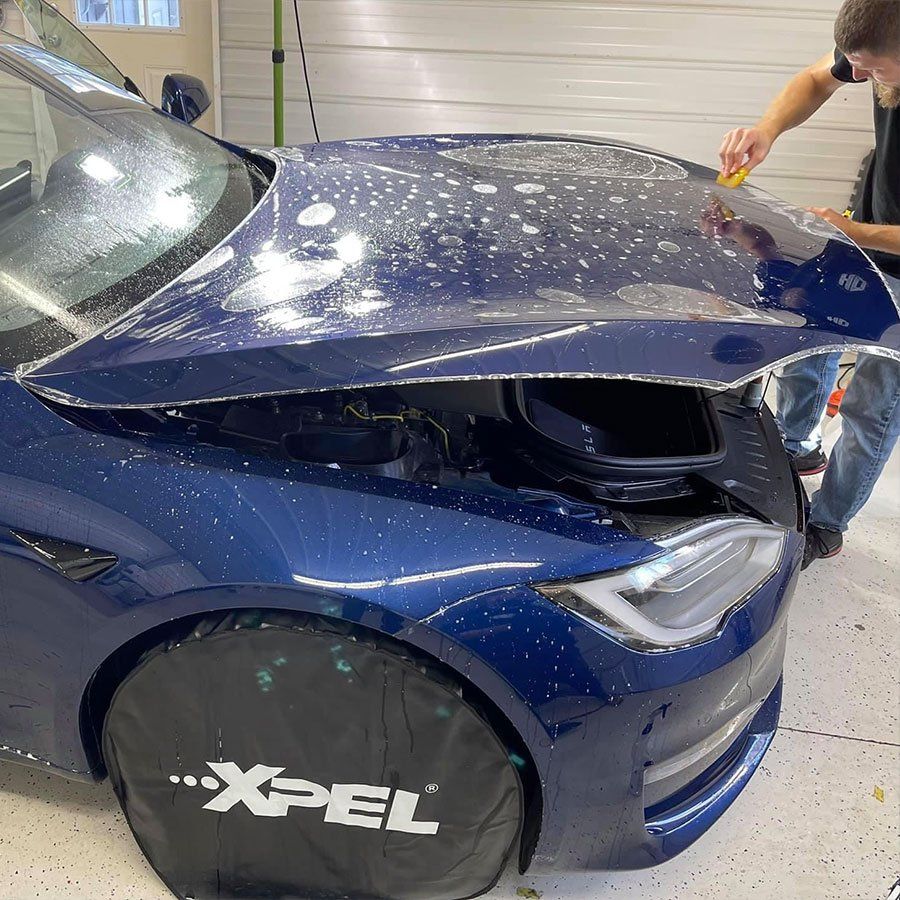
For instance, if you're applying PPF to your car's front bumper, measure and cut the film so that it extends slightly beyond the edges of the bumper. This will allow for proper coverage and overlap.
Once you have your cut piece of PPF, carefully peel back a small portion of the backing paper from one corner. Align that corner with the corresponding section of your vehicle, making sure it's properly positioned, before proceeding.
As you continue peeling back the backing paper, use your applicator tool or squeegee to smooth out any air bubbles or wrinkles that may appear. Work slowly and methodically, pressing the film firmly against the surface as you go.
TIP:
If you encounter stubborn wrinkles or bubbles when applying the film, use a heat gun or blow dryer set to low heat to gently warm up the area. This will make it easier for the film to conform to the curves and contours of your vehicle.
Carefully trim any excess film using an X-Acto knife or precision cutting tool. Take your time with this step to ensure clean and precise edges.
Repeat this process for each section of your vehicle that requires PPF protection, taking care to match up the edges and seams for a seamless appearance.
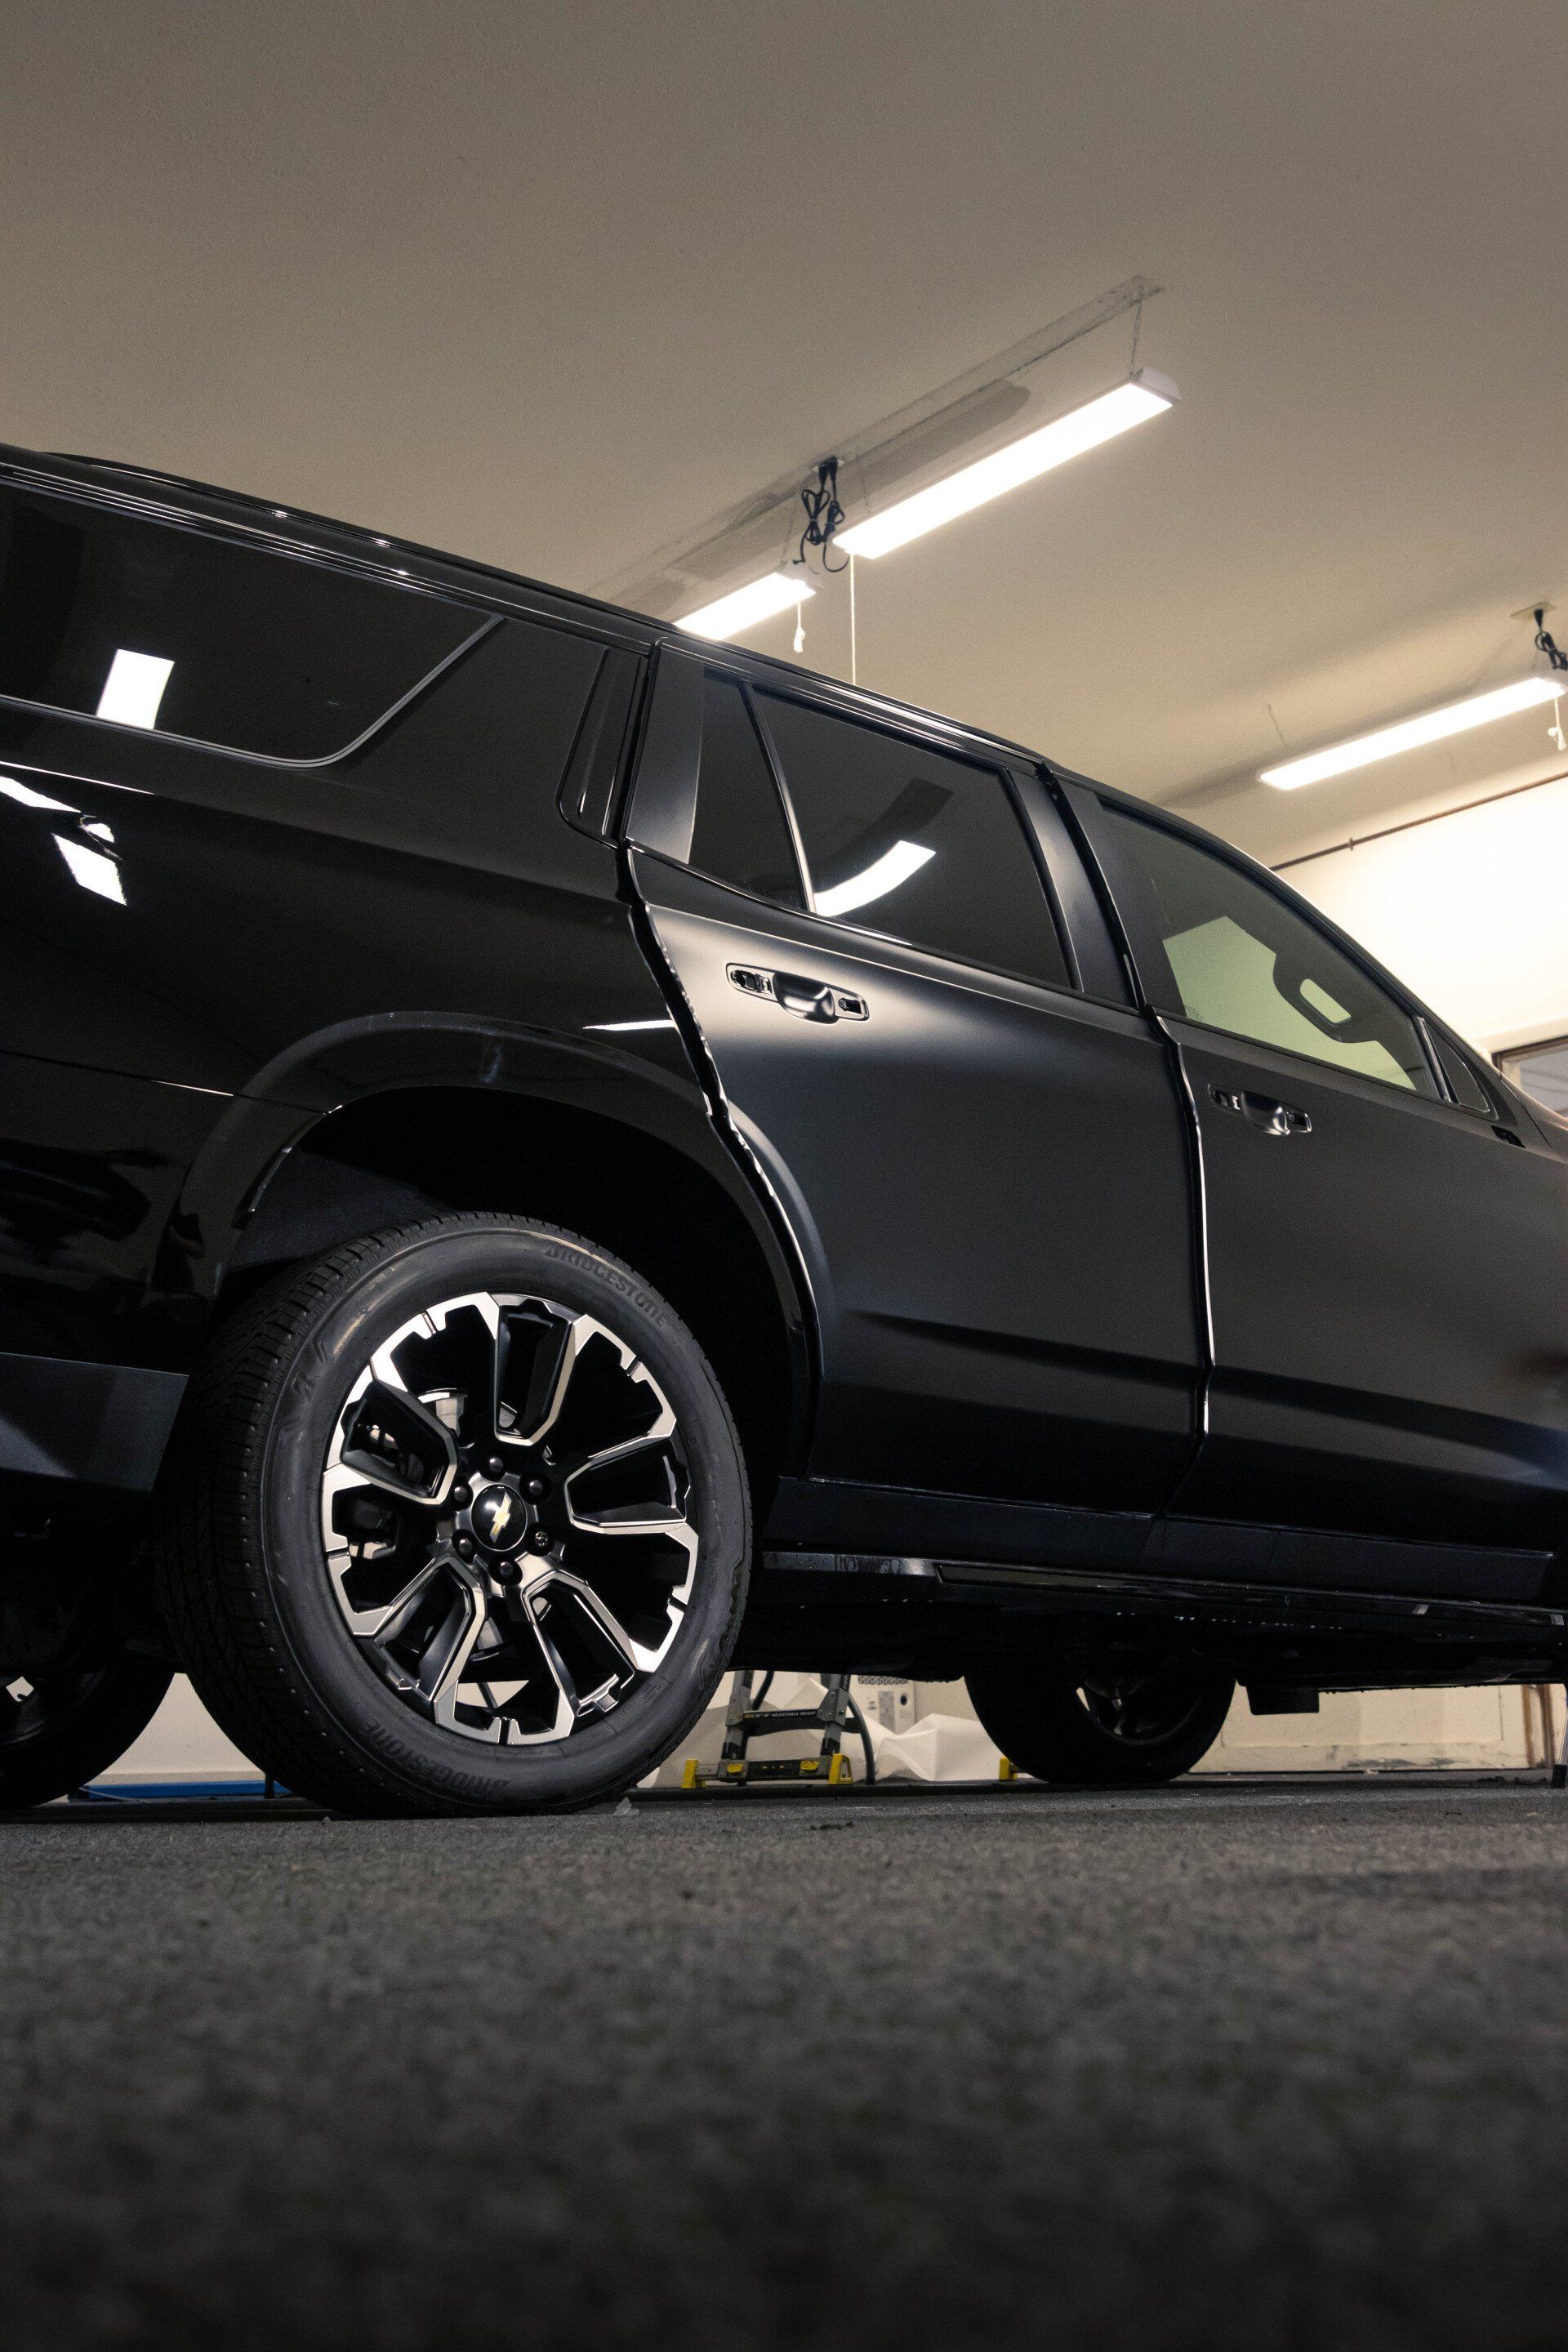
Caring for Your Newly Protected Vehicle
Congratulations on completing the installation of paint protection film (PPF) on your vehicle! Now, let's discuss some important tips for caring for your newly protected surface:
After the installation, avoid washing your vehicle for at least 24-48 hours to allow the adhesive to fully cure. This will ensure optimal bonding between the PPF and your vehicle's paintwork.
When it comes time to wash your car, use a pH-neutral automotive soap or an appropriate PPF cleaner. Avoid harsh chemicals or abrasive cleaners that can damage or degrade the protective film.
For instance, consider using a microfiber wash mitt or sponge instead of a rough-bristled brush that may scratch or mar the surface.
Rinse the vehicle thoroughly before washing, ensuring that any loose debris or dirt is removed. This will prevent potential scratching during the cleaning process.
When drying your car, use a soft microfiber towel or a high-quality synthetic chamois. Pat dry gently rather than rubbing forcefully, as excessive friction can cause damage or affect the integrity of the PPF.
To maintain the appearance and durability of your PPF, it's recommended to apply a sealant or wax specifically designed for use on paint protection films. These products help enhance gloss, add an extra layer of protection, and make cleaning easier.
Consider using a ceramic coating designed for PPF, as it provides long-lasting and hydrophobic properties that repel water, dirt, and contaminants.
Regularly inspect your PPF for any signs of damage or lifting edges. Minor scratches or scuffs can sometimes be healed by applying heat with a heat gun or blow dryer set to low heat. However, if the damage is significant or compromises overall protection, consult a professional for repairs or replacement.
With proper care and maintenance, your newly protected vehicle will continue to look pristine and retain its value. Remember to adhere to the recommended cleaning techniques and promptly address any issues that arise to ensure the longevity of your paint protection film.
Tips for Maintenance and Longevity
Once you've successfully installed paint protection film (PPF) on your vehicle, the next step is to ensure its proper maintenance to maximize its longevity. By taking some simple yet effective measures, you can keep your PPF looking pristine and performing at its best.
First and foremost, regular washing is essential to remove dirt, dust, and other contaminants that may accumulate on the film's surface. Use a pH-neutral car wash soap and a soft microfiber wash mitt or sponge to gently clean the PPF. Avoid abrasive brushes or scrubbers that could potentially scratch or damage the film.
Imagine this: You've just returned from an off-road adventure, and your vehicle is covered in mud. It's tempting to blast it with a high-pressure washer or vigorously scrub away the dirt. However, taking a moment to consider the fragility of the PPF will remind you to be gentle during the cleaning process.
So here's where another tip comes into play: Opt for touchless car washes whenever possible. These car washes use high-powered jets of water and specialized detergents to remove dirt without physically touching your vehicle's surface. This gentle approach minimizes any risk of causing damage to your PPF while still ensuring a thorough cleaning.
After washing, make sure to dry the PPF thoroughly using a clean microfiber towel, as trapped moisture can cause spotting or streaks. Additionally, avoid exposing your vehicle to direct sunlight immediately after washing, as this can lead to water spots and premature drying of the shampoo residue.
Routine inspections are also crucial for maintaining the integrity of your PPF. Regularly inspect the film for any signs of peeling, bubbling, or lifting at the edges. If you
notice any issues, address them promptly by contacting a professional installer or following manufacturer-recommended repair procedures.
Lastly, protect your PPF from harsh environmental elements. Avoid parking under trees where sap, bird droppings, and other debris can fall onto the film. If you live in an area with extreme weather conditions, consider using a car cover to shield your vehicle from potential damage.
By following these maintenance tips and giving your PPF the attention it deserves, you can extend its lifespan and enjoy long-lasting protection for your vehicle's paint.
Why Paint Protection Film Installed By The Professional Is Recommended?
Professional paint protection film is recommended if you are unsure of how to protect your vehicle's finish. A professional touch is essential when it comes to maintaining the appearance of your vehicle, providing superior precision and expertise that cannot be found with DIY kits. Our professionals in The Detail Doc possess the experience to eliminate imperfections, align the film without air bubbles, and prevent misalignments - no need for air bubbles!
Furthermore, thanks to the high-quality materials and cutting-edge tools we have access to, your PPF not only offers protection from rock chips, minor scratches, and UV rays but also maintains the aesthetic appeal of your car while providing aesthetic benefits that protect it as well. Trust our professionals to safeguard your investment while you relax, knowing it is safe from harm. Trust us with the peace of mind that comes from professional PPF installation!
Final Words
Don't settle for less when it comes to safeguarding your most prized possession; reach out to our experienced PPF specialists at The Detail Doc for top-tier installation services that will keep your car looking showroom new. Invest in its longevity and appearance now by reaching out - let us show you firsthand! Your car deserves only the best, so
contact us now so we can bring our expertise. Experience its benefits first-hand yourself; your car deserves nothing less!
The Detail Doc Blog